Setup your business with Sensabooking
Enable online booking page
Online booking page is one of the most powerful and unique tools Sensabooking offers. It’s basically a mini-website that can serve branding and booking purposes. If you don’t have a website yet, online booking page will do the job.
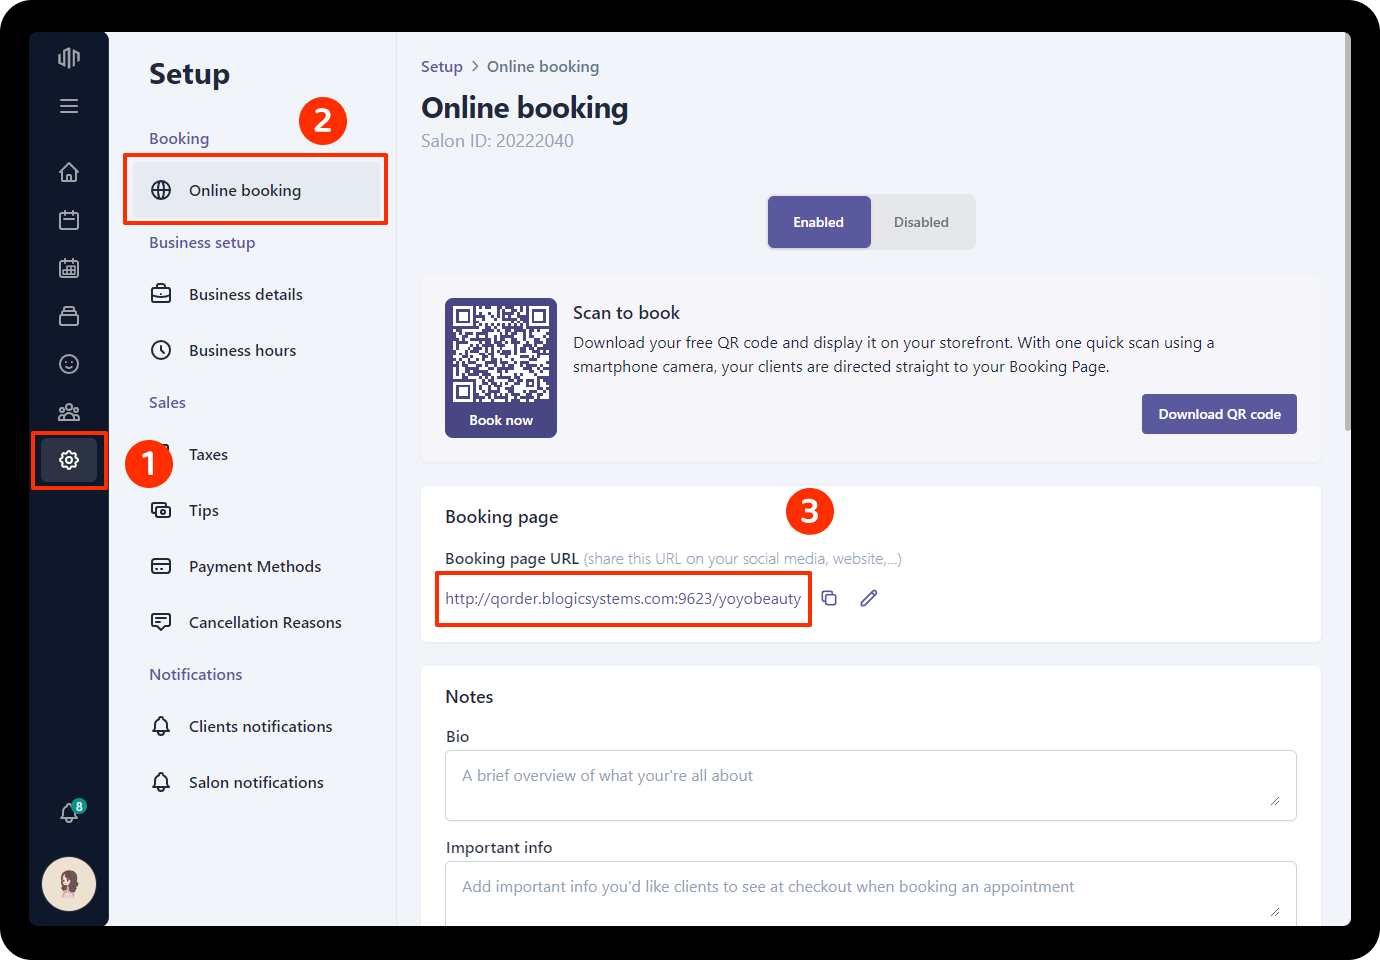
Before your clients can book from your page, you need to Enable online booking
To enable online booking:
- Go to Setup on the side menu bar
- Click Online booking section
- Click Enabled

Booking page URL is the link to your Booking Page, it’s a standalone page that you can share in multiple ways
- Link to it in your email signature
- Create a book me button on your website
- Add it to your social media
- Offer it as a QR code or just download the QR code above
Why QR code?
Your QR code for appointments and make it a gateway to your online Booking Page. With a single scan, your customers can access your service menu and real-time availability. Display your QR code on your storefront and allow foot traffic to self-schedule while on-the-move

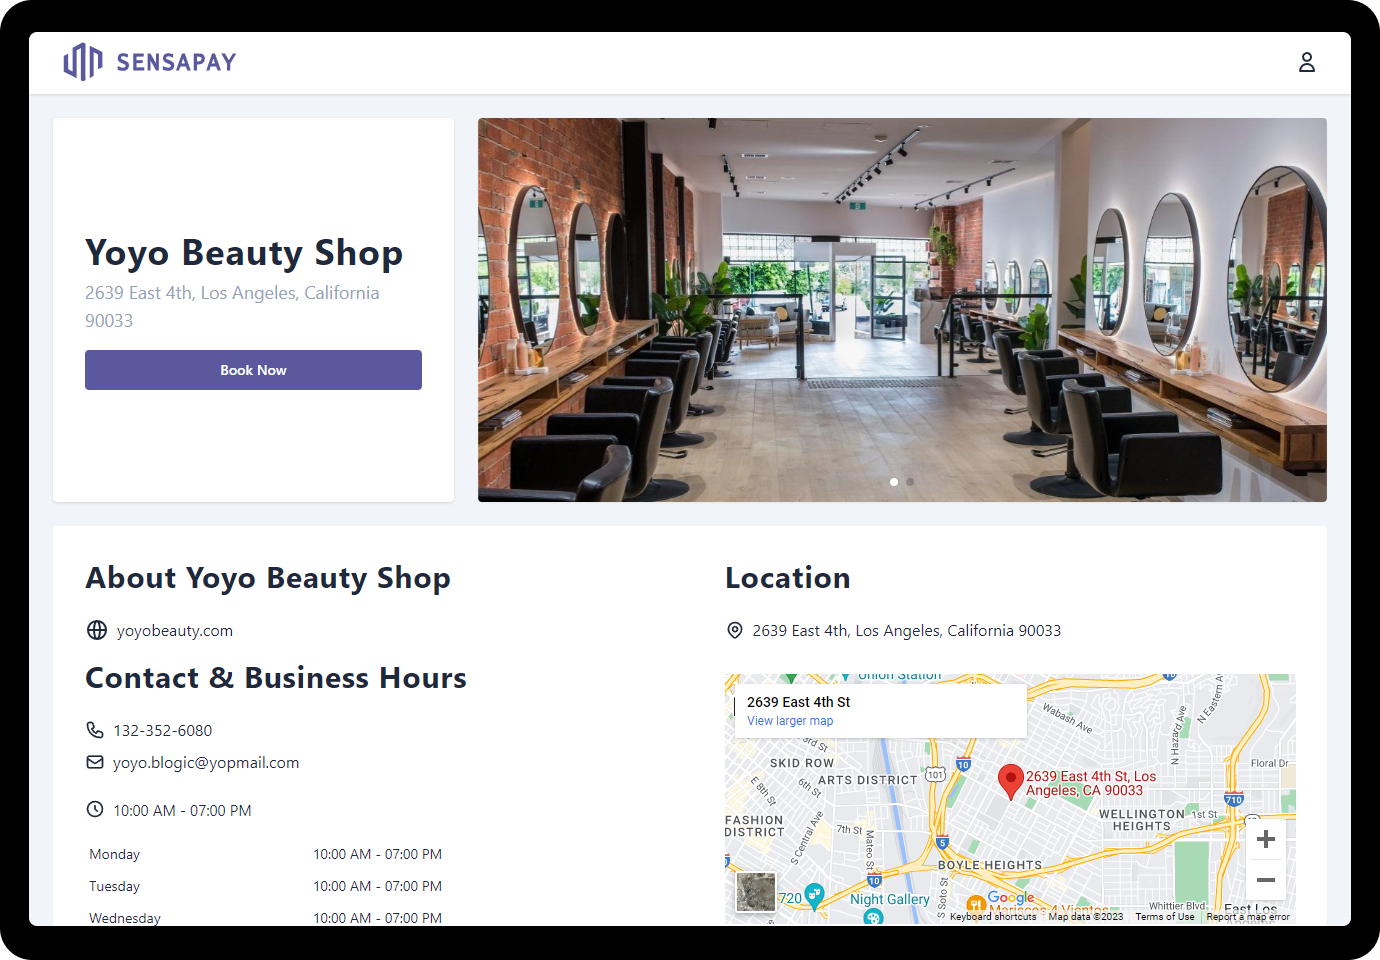
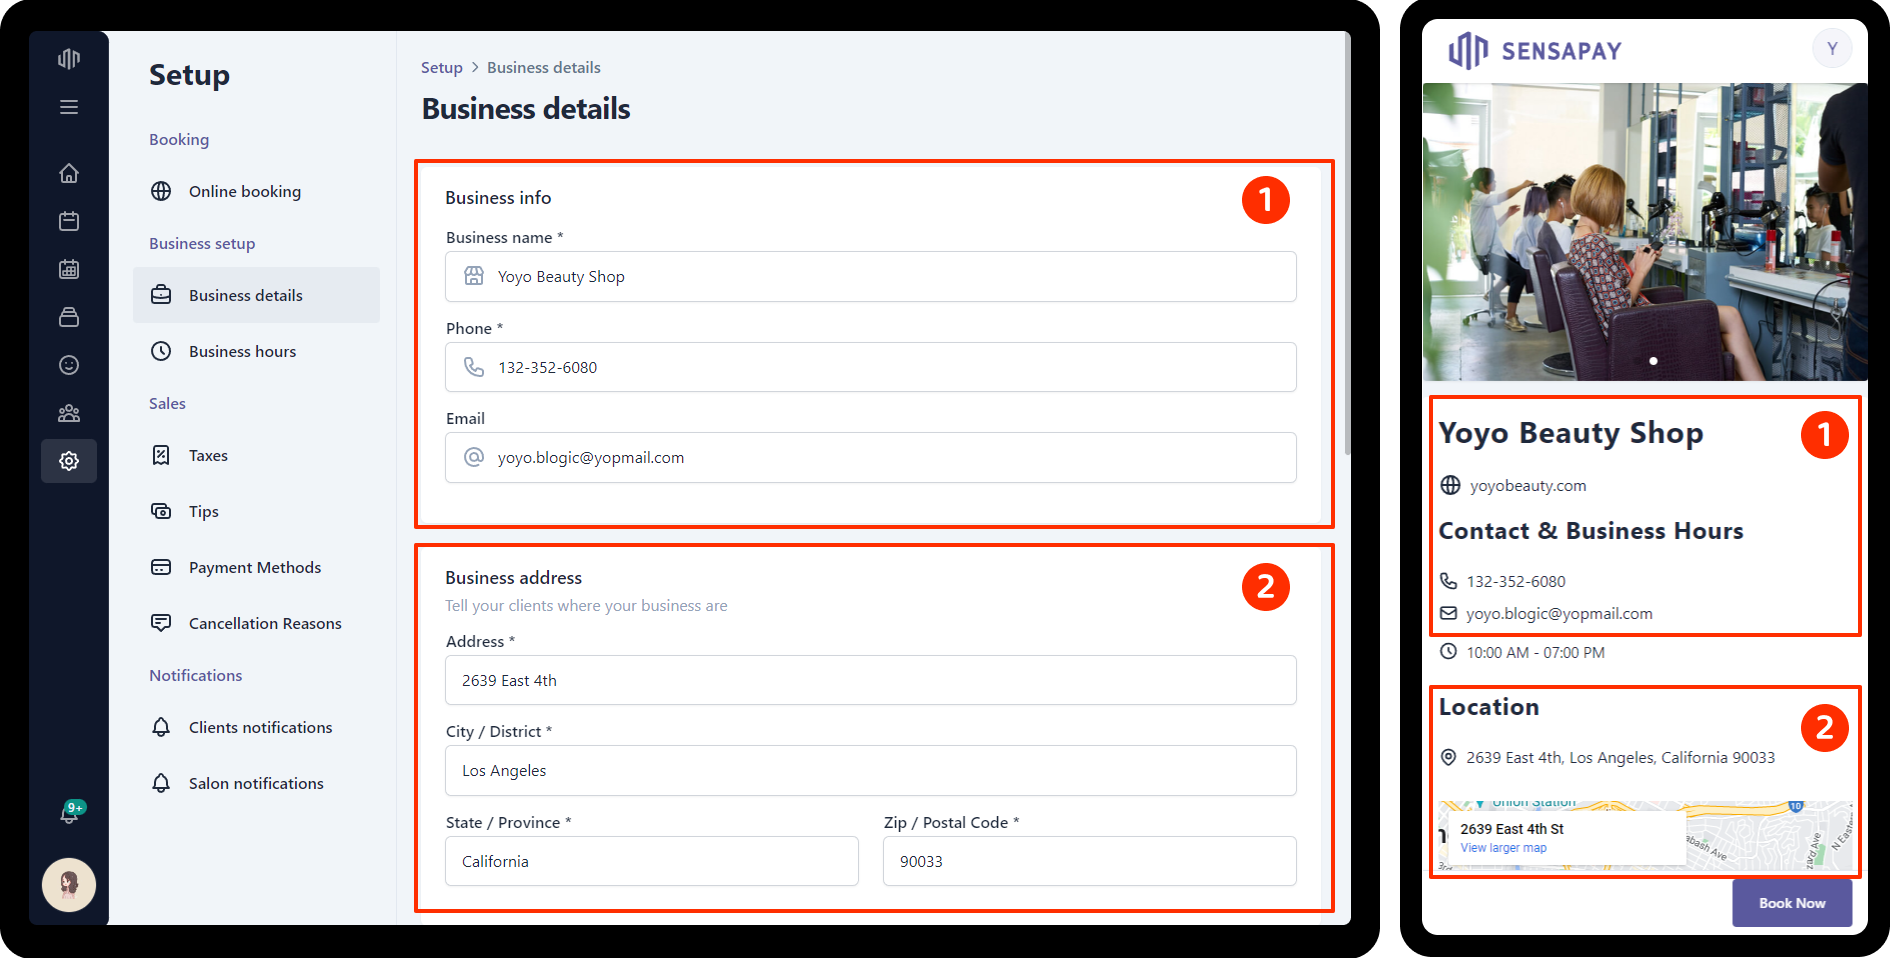
Setup online booking profile
- Go to Setup on the side menu bar
- Go to Business details section
- Set up your business name, intro, contacts, address, logo, social links…
- Hit Save on the bottom-right corner to save the changes.
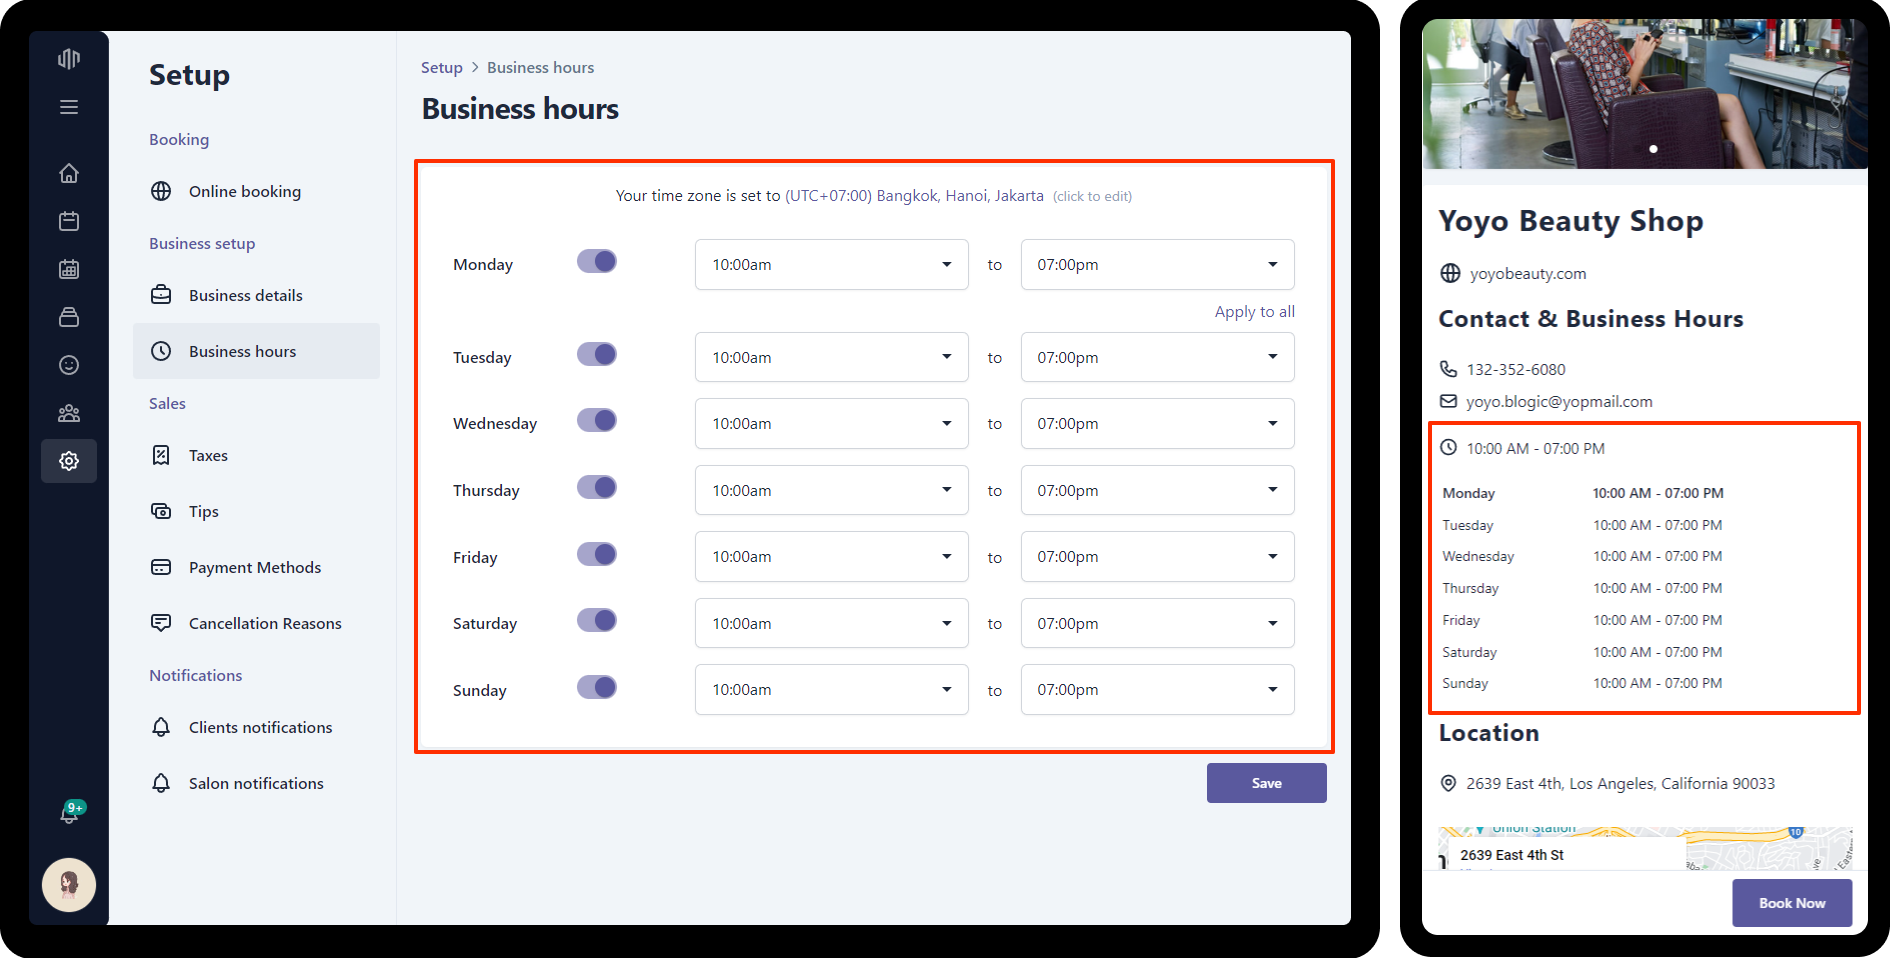
Set up the Business hours showing on your booking page
- Go to Setup on the side menu bar
- Go to Business hours section
- Make changes
- Hit Save on the bottom-right corner to save the changes.
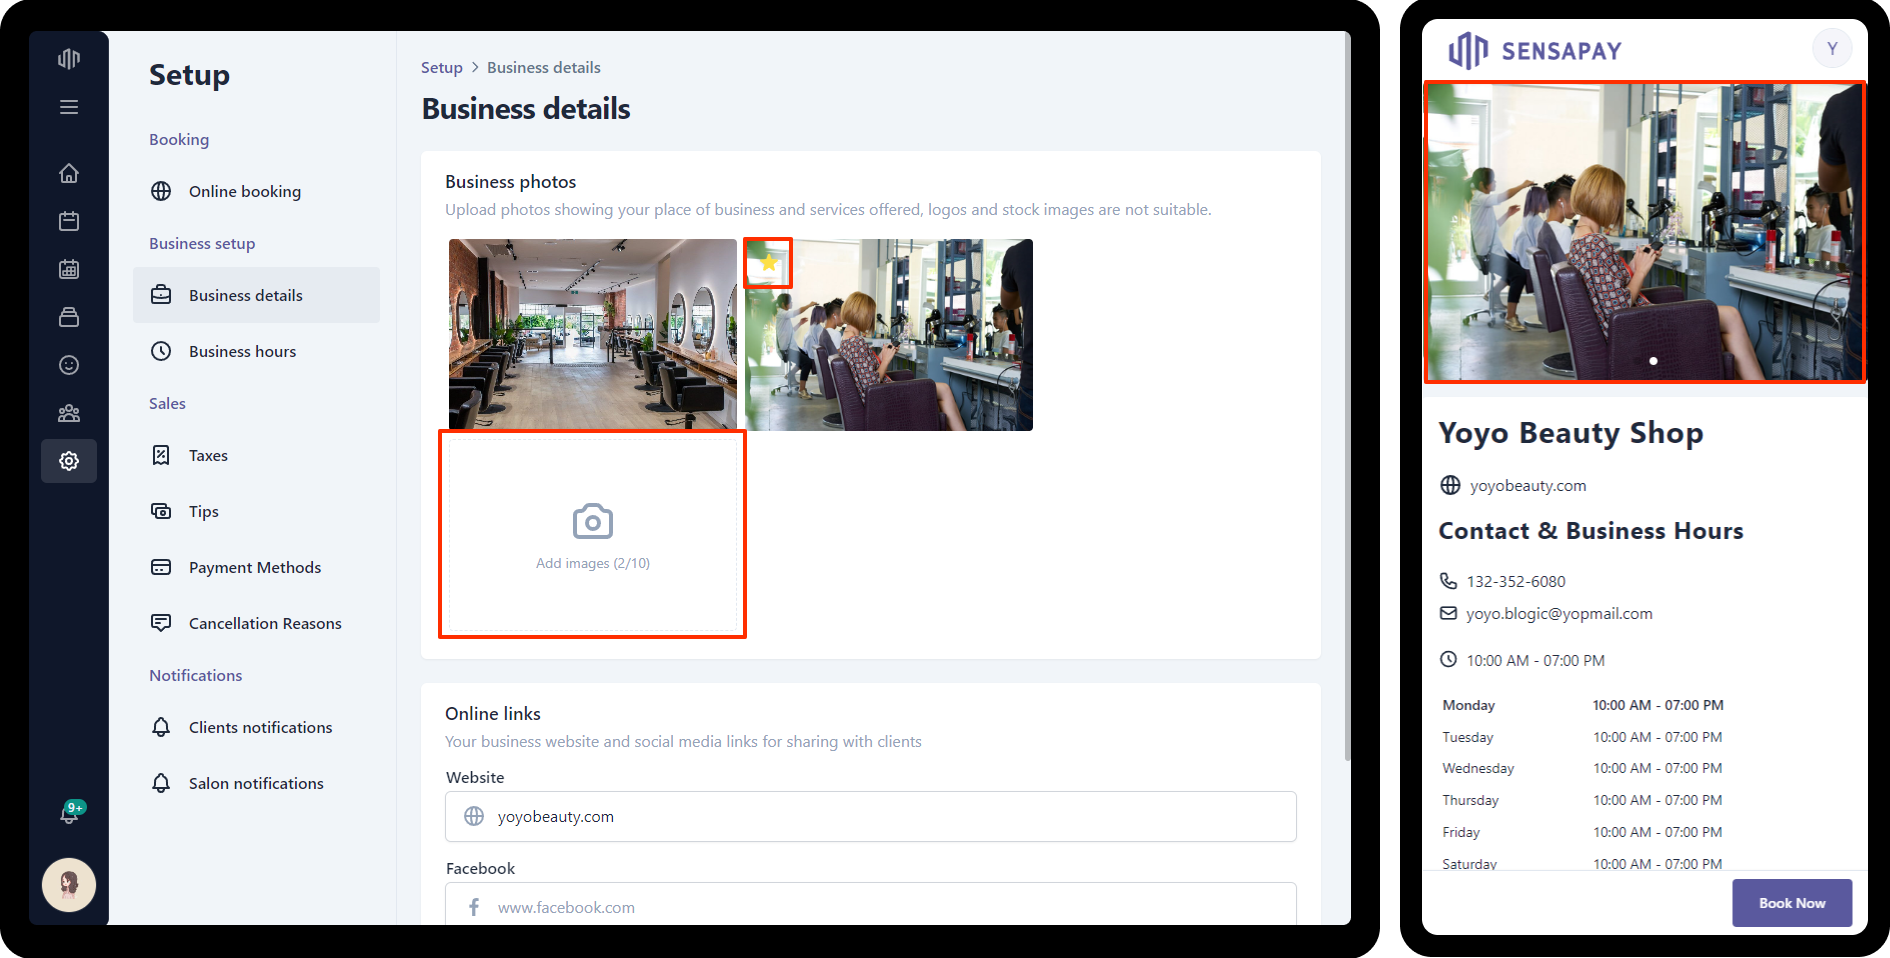
Add some photos to showcase your services and start attracting new clients
First impressions are important, and using high-quality photos that show your clients what your business has to offer can help your marketplace profile stand out from the competition.
To add showcase photos:
- Go to Business details section. Scroll down to Business photos
- Click Add images button
- Select photos you want to upload from your computer. Multiple photos are allowed, maximum 10 photos.
- Hit Save on the bottom-right corner to save the changes.
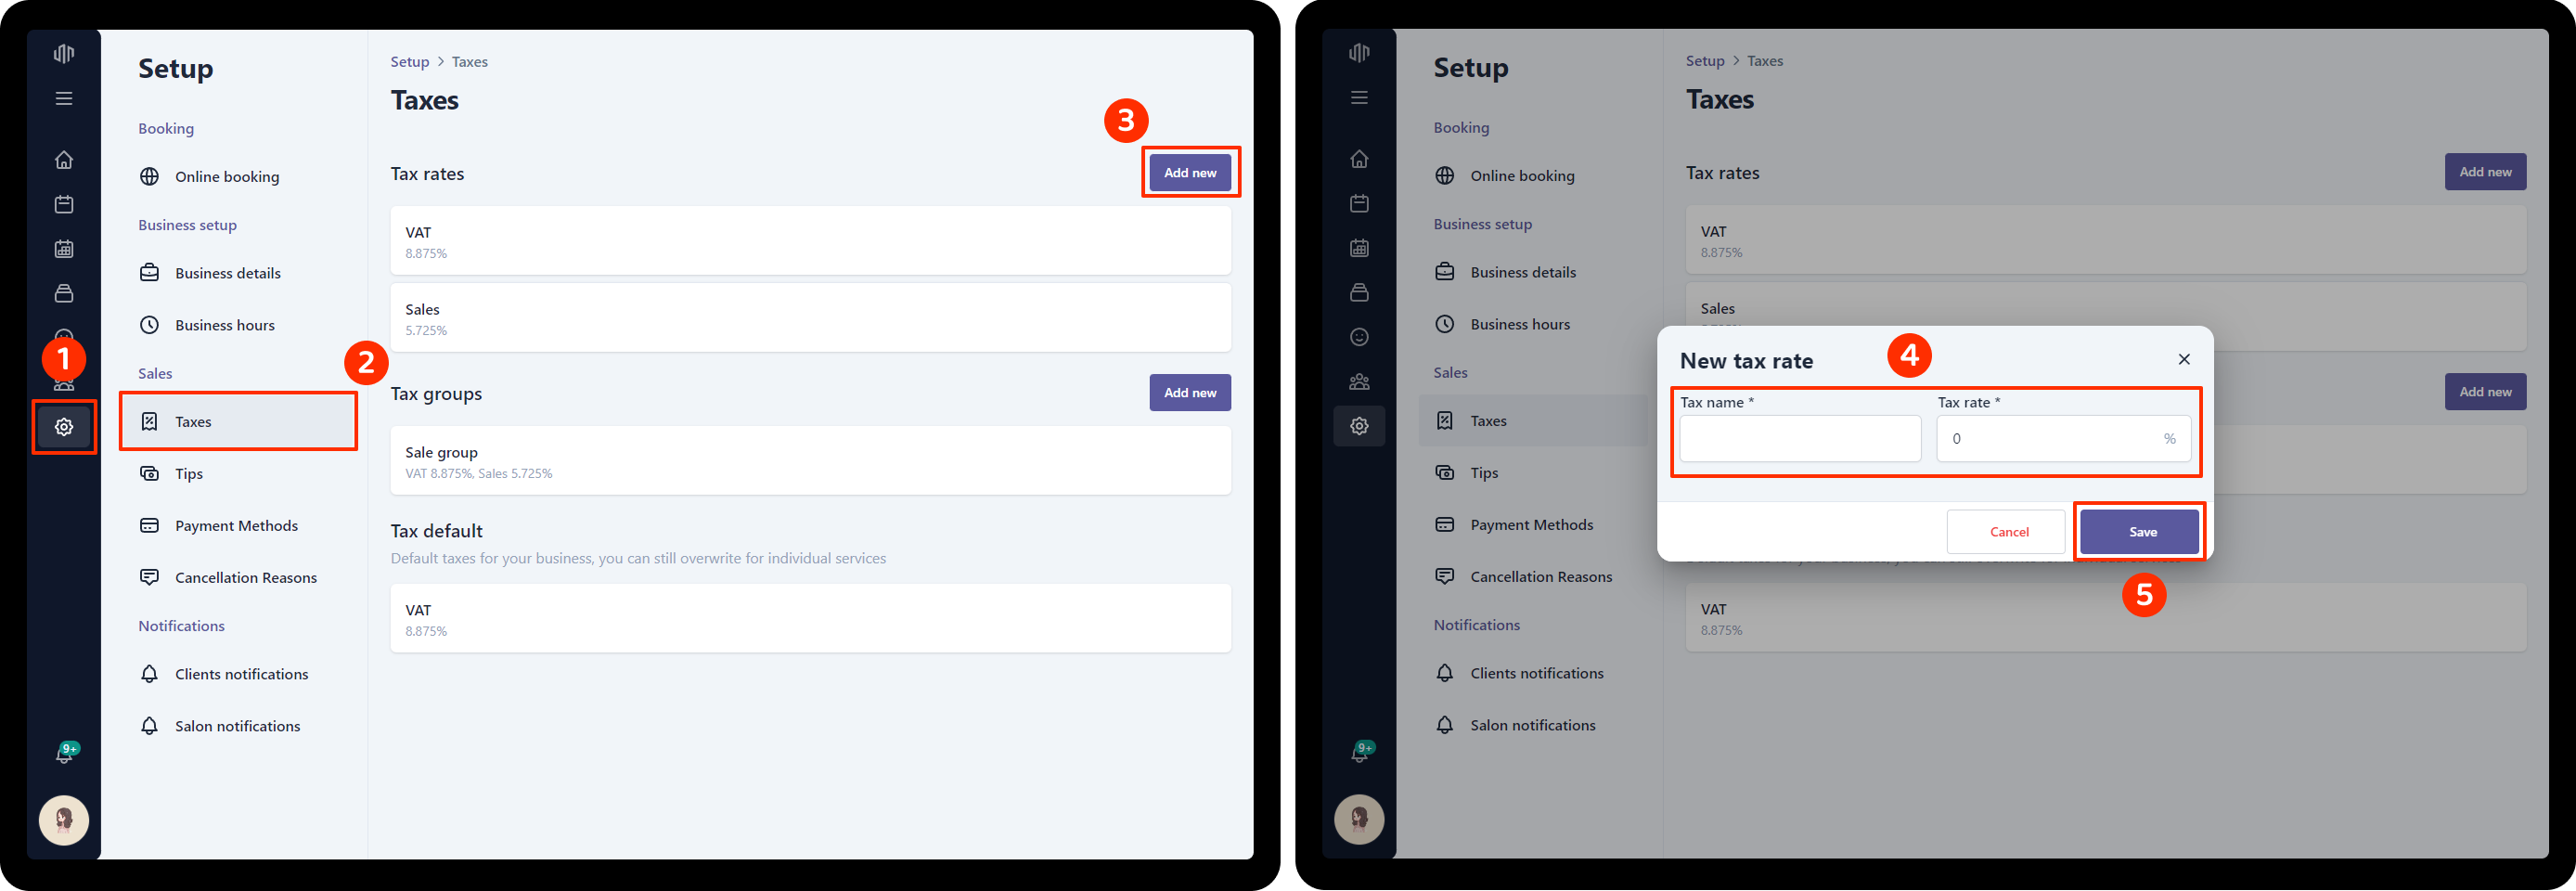
Setup taxes - tax groups
Tax rate
Every country and state has its own requirements for recording taxes. We will automatically calculate the tax contribution for each invoice raised, based on your personal settings.
To add a new tax rate:
- Go to Setup on the side menu bar
- Click Taxes
- In section Tax rates Click Add new
- Set the tax name and tax rate
- Click Save
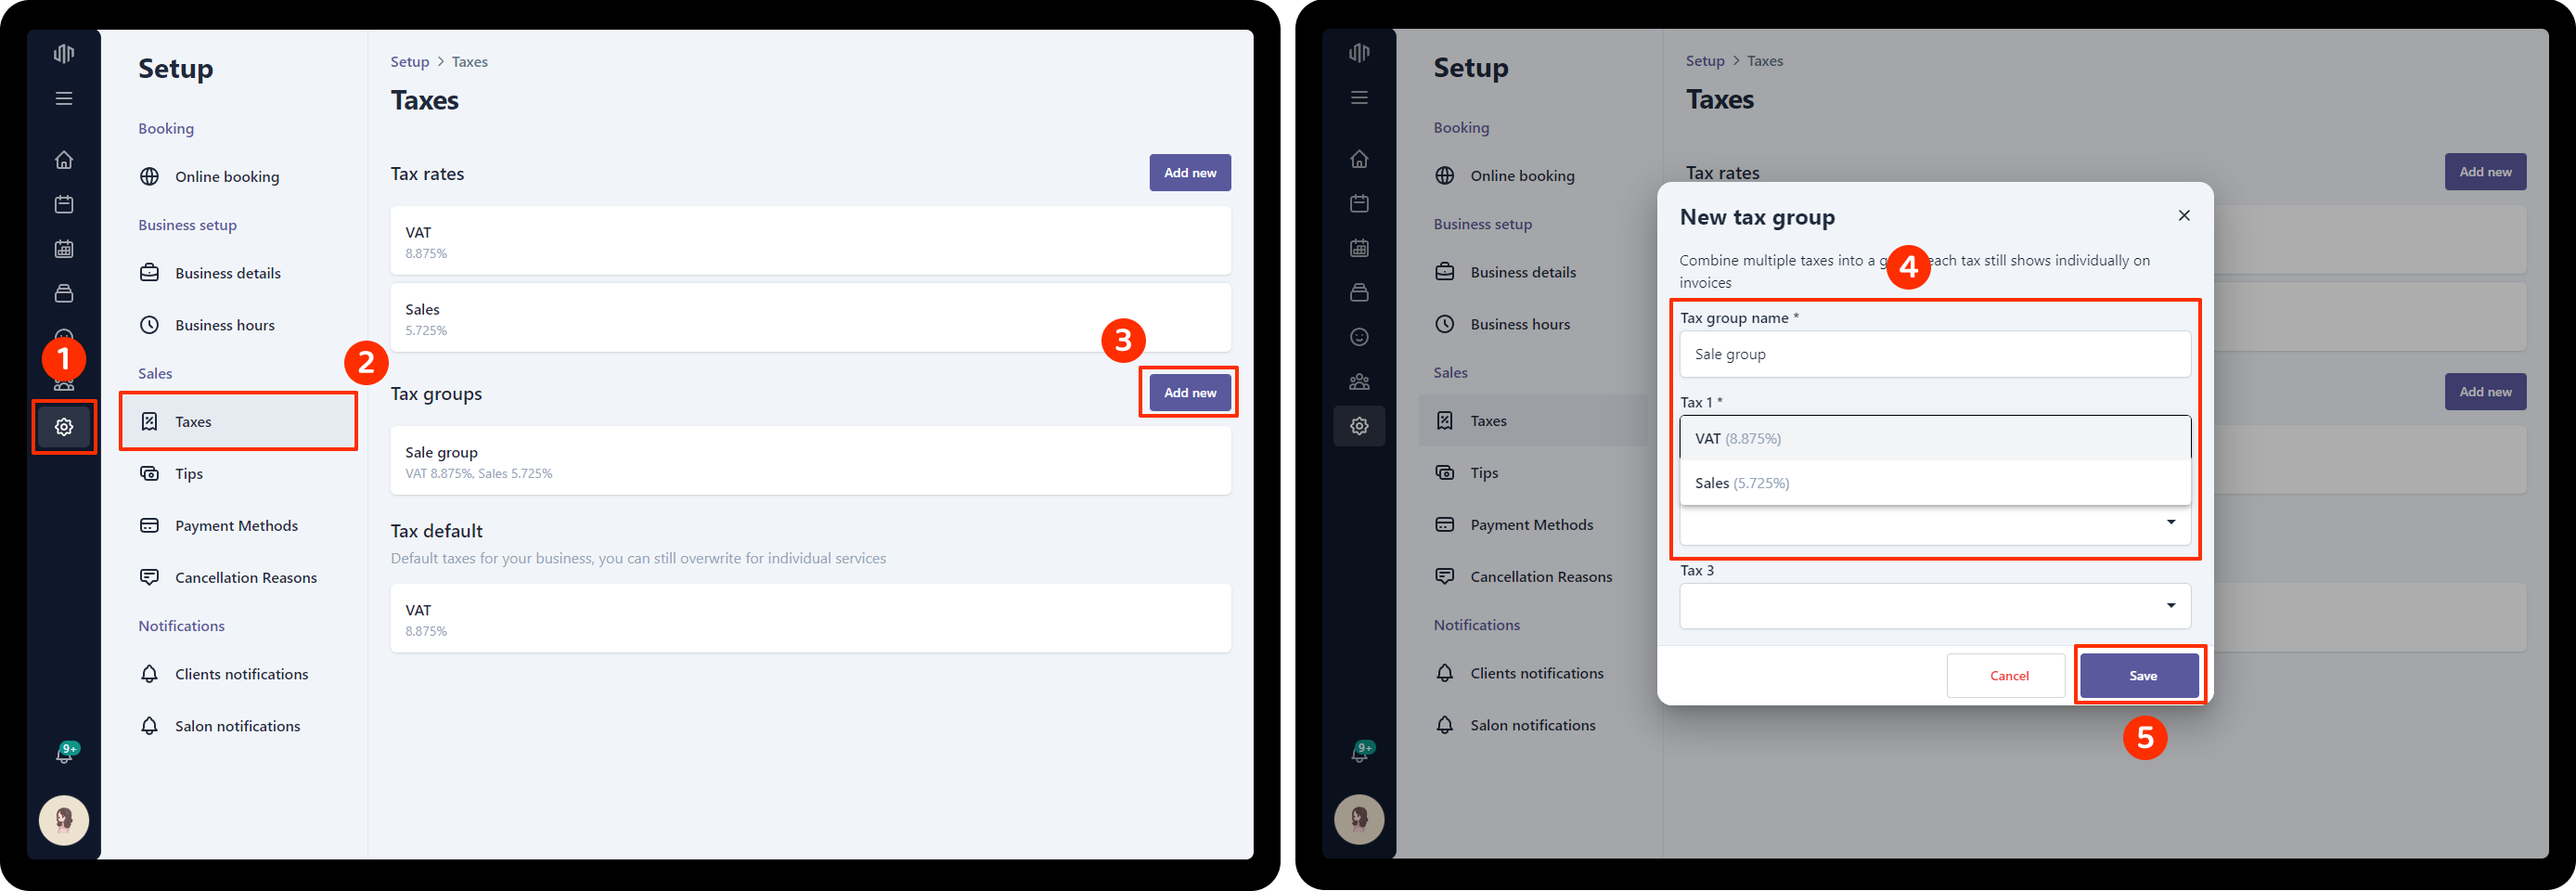
Tax group for multiple taxes
You may be required to display multiple taxes on your invoices. For example, users in Canada may be required to display both GST and PST.
To add new tax group:
- Go to Setup on the side menu bar
- Click Taxes
- In section Tax groups Click Add new
- Add your tax group name and choose which taxes you’d like to assign to this tax group from the dropdown.
- Click Save
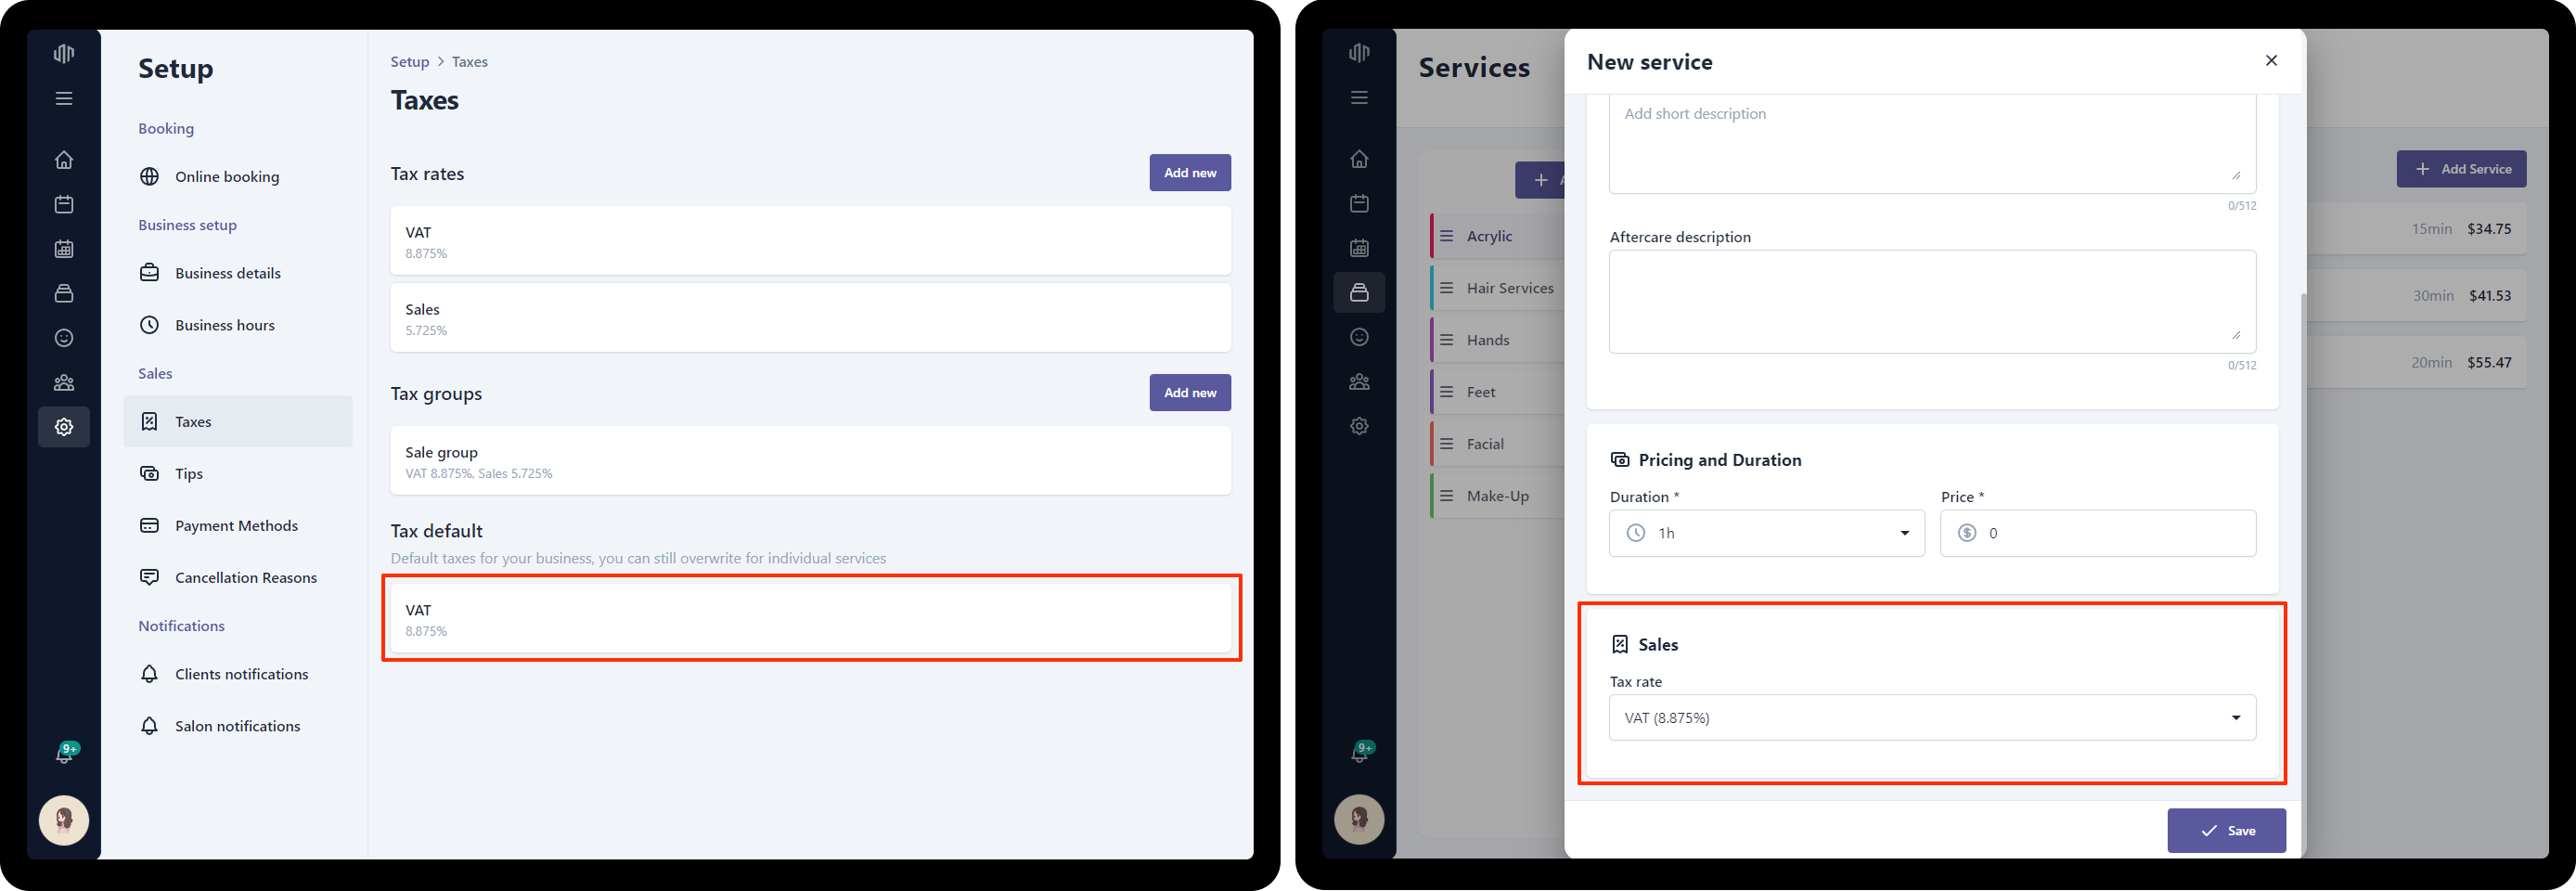
Tax default
Set the default tax will automatically apply to services
Setup services
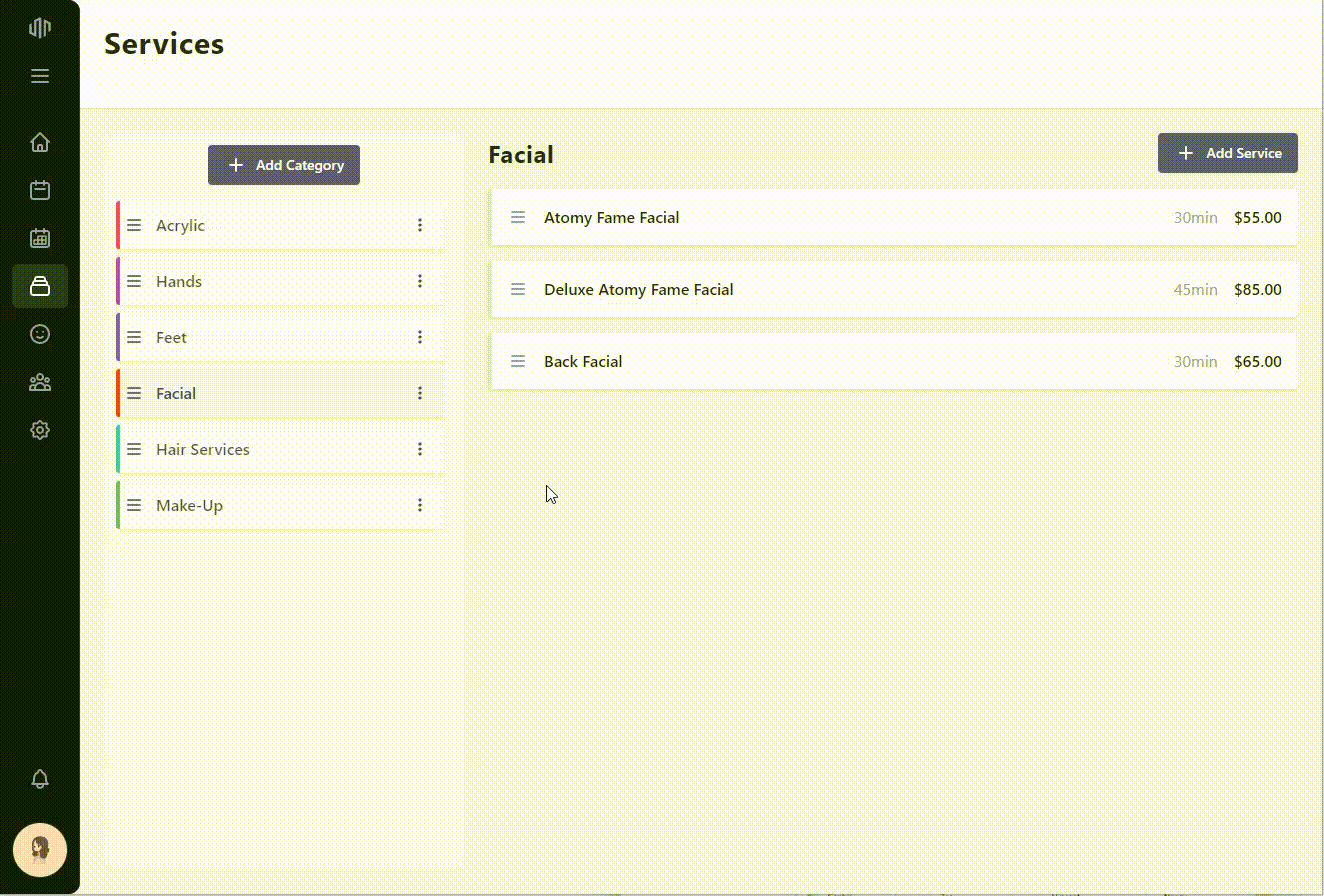
Services are the first thing clients choose when booking an appointment online, so it’s important to make it easy for clients to find what they’re looking for. Categories for the services you provide makes it quick and easy for your clients to browse for services and choose which one is right for them.
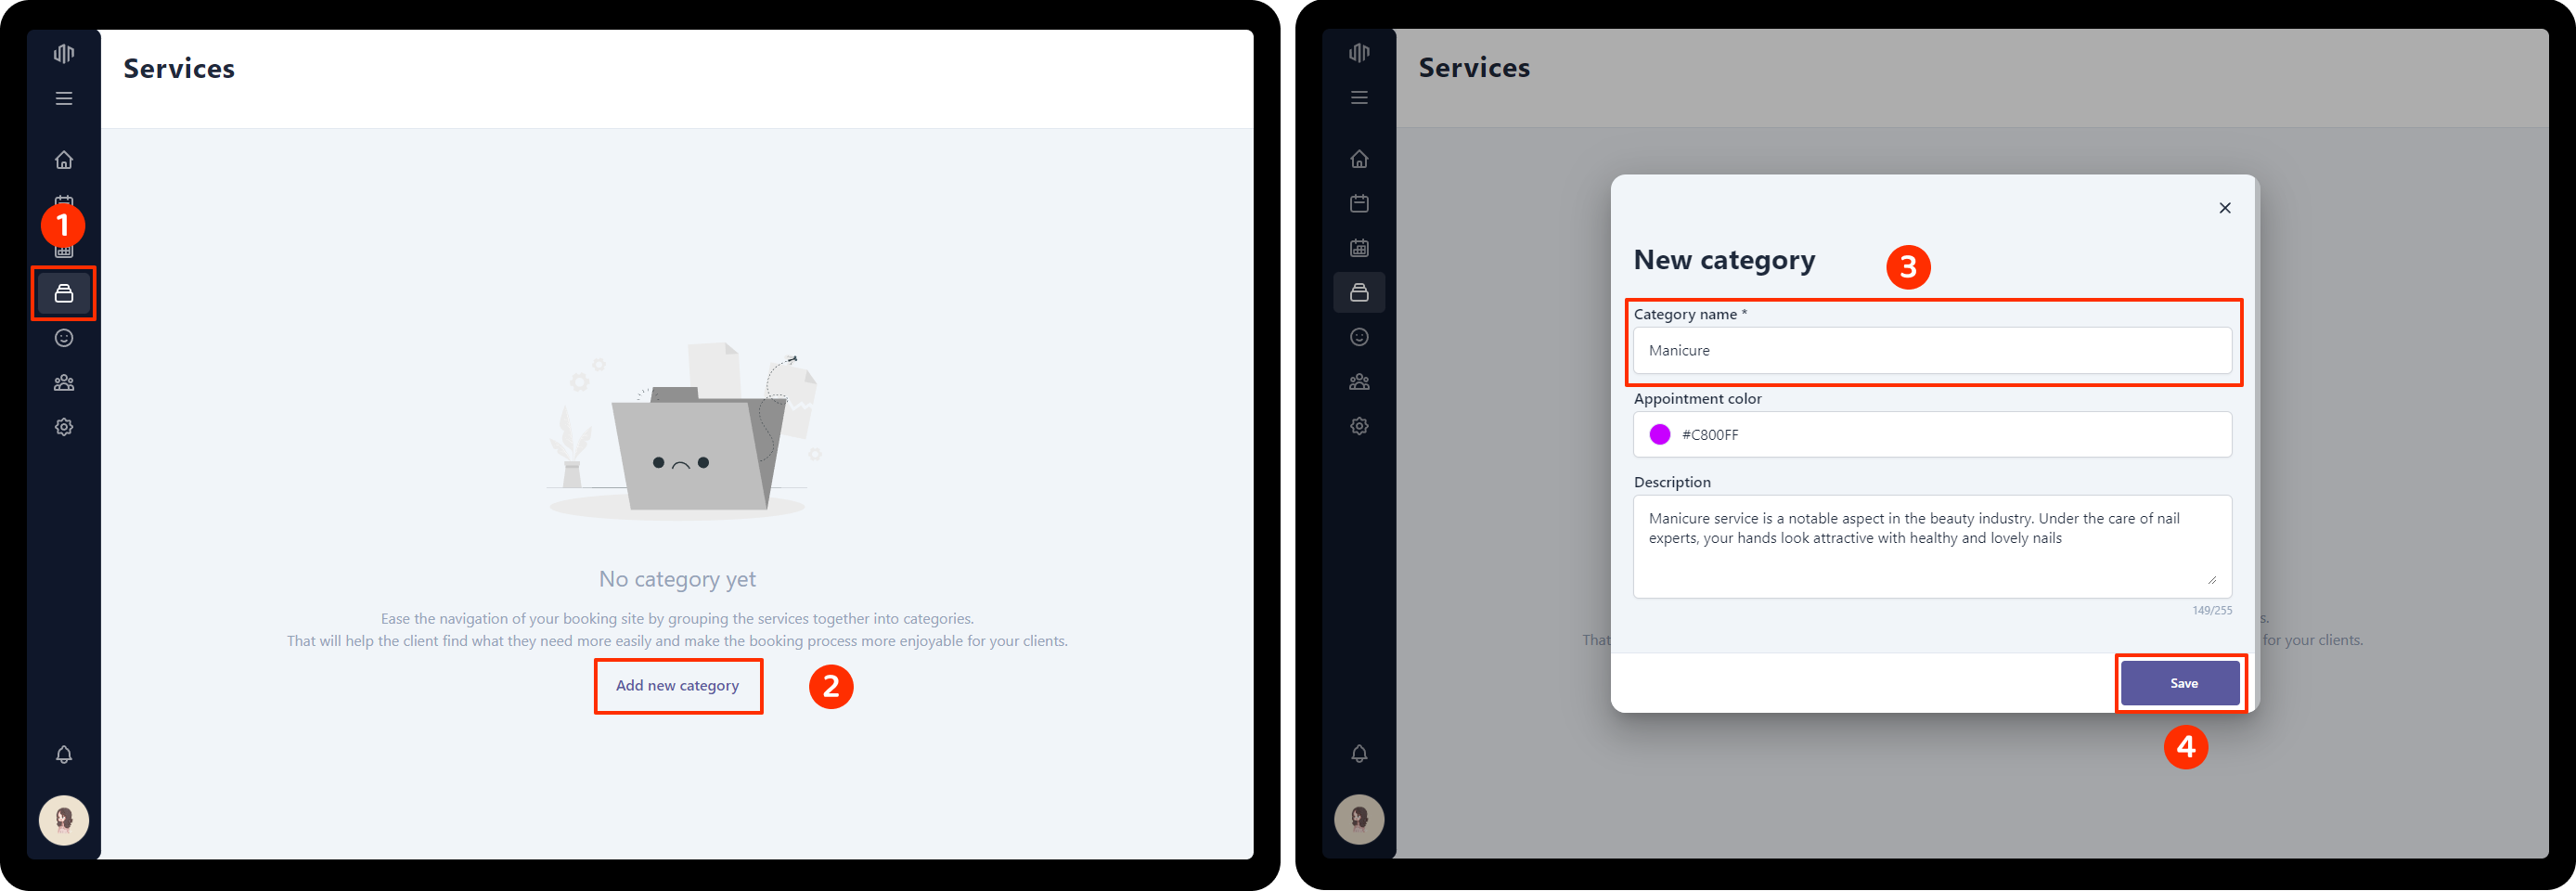
To add new category:
- Go to Service on the side menu bar
- Click Add new category
- Set Category name, other fields is optional
- Click Save
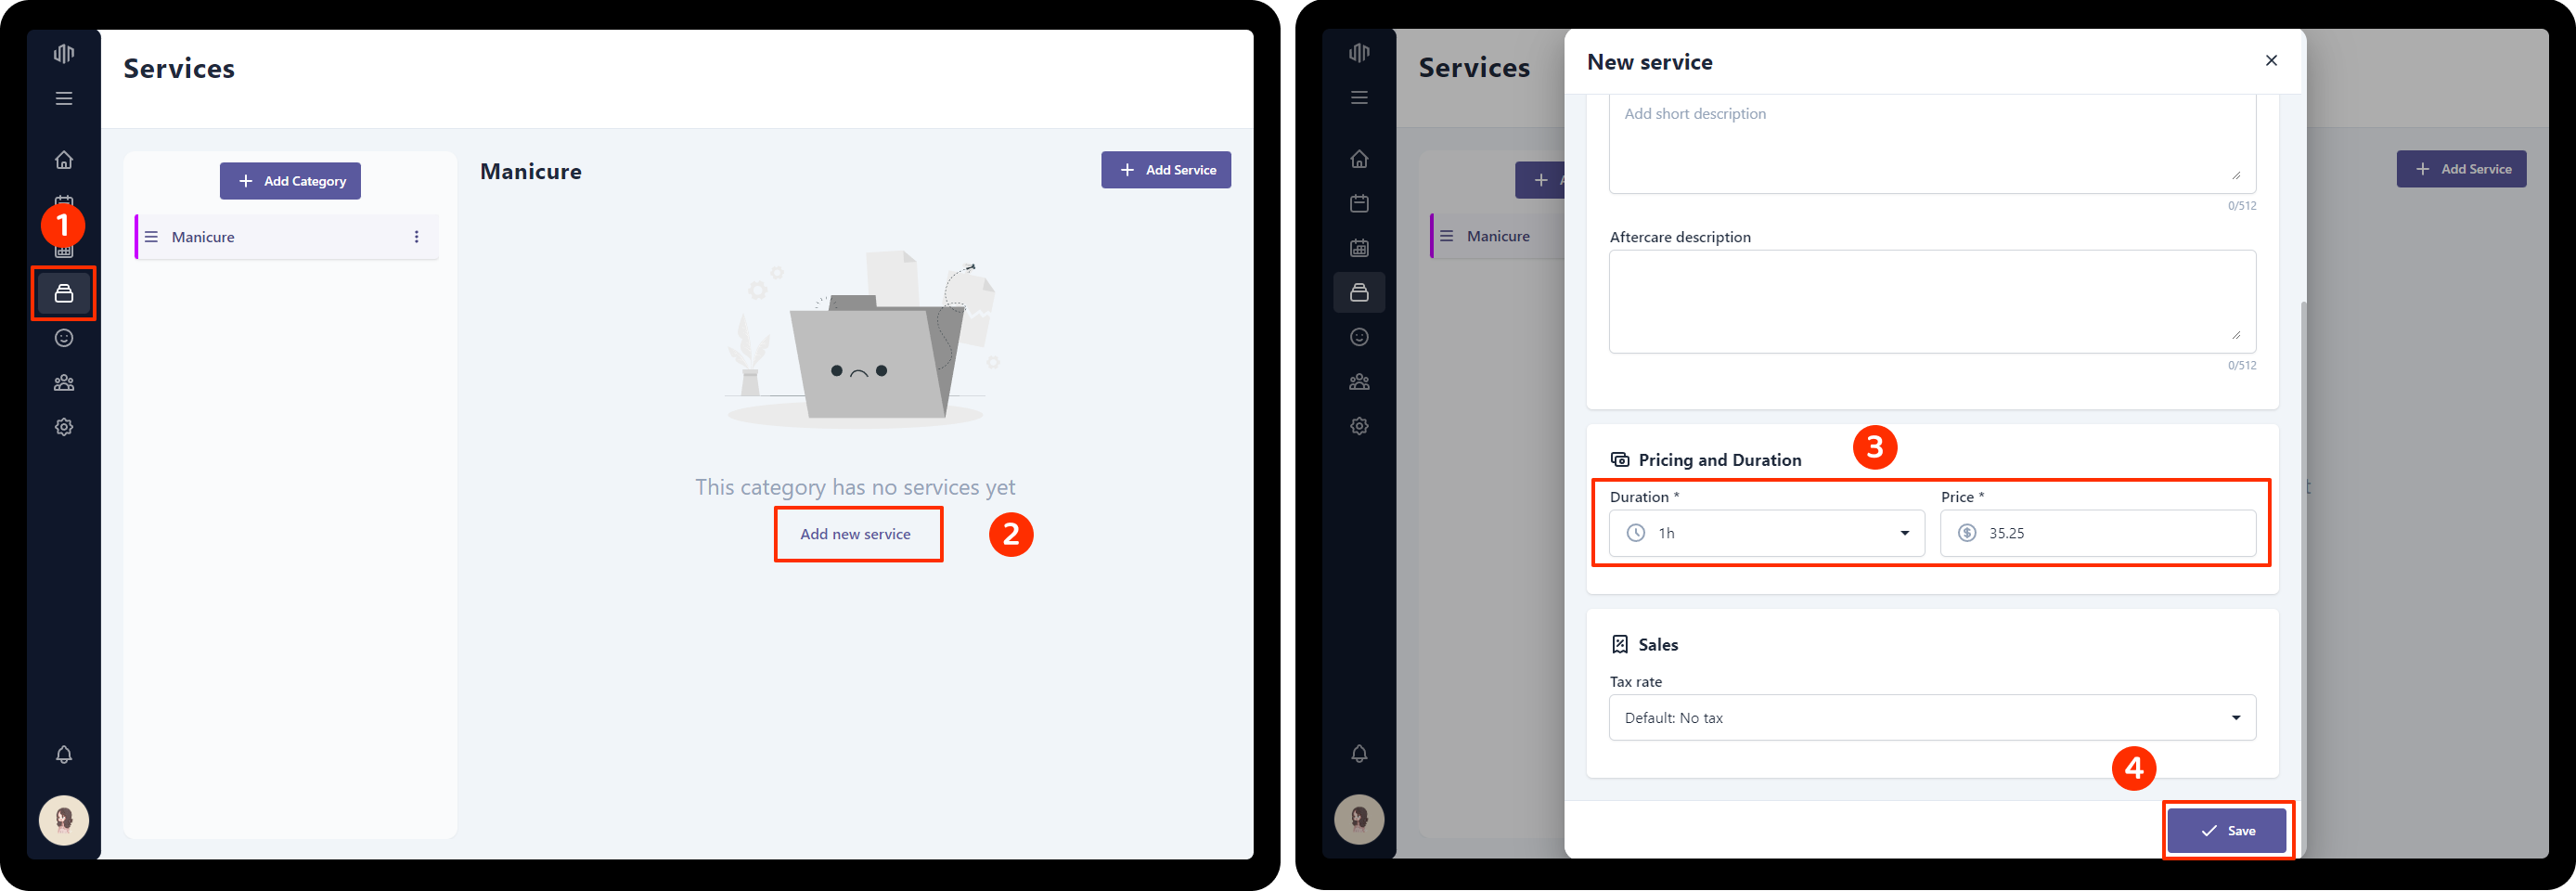
To add new service:
- Go to Services on the side menu bar
- Click Add new service
- Set Service name, Duration, Price, other fields is optional
- Click Save
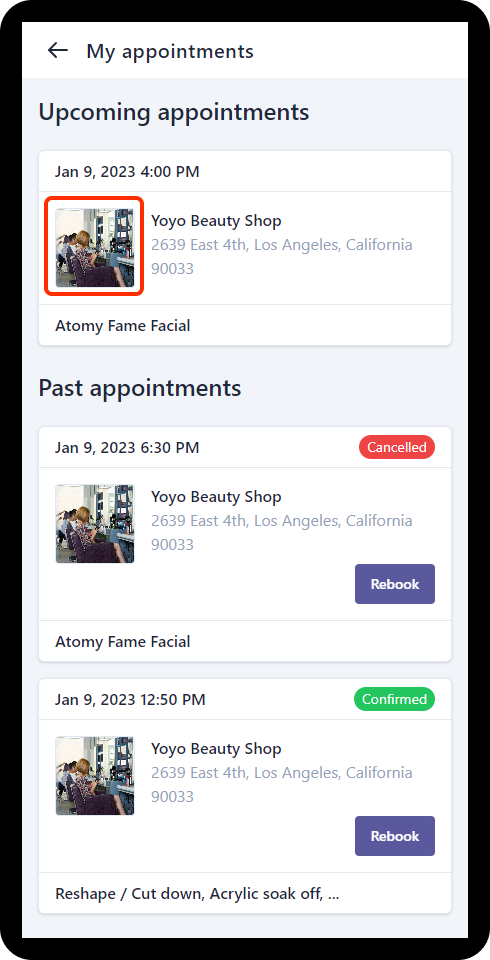
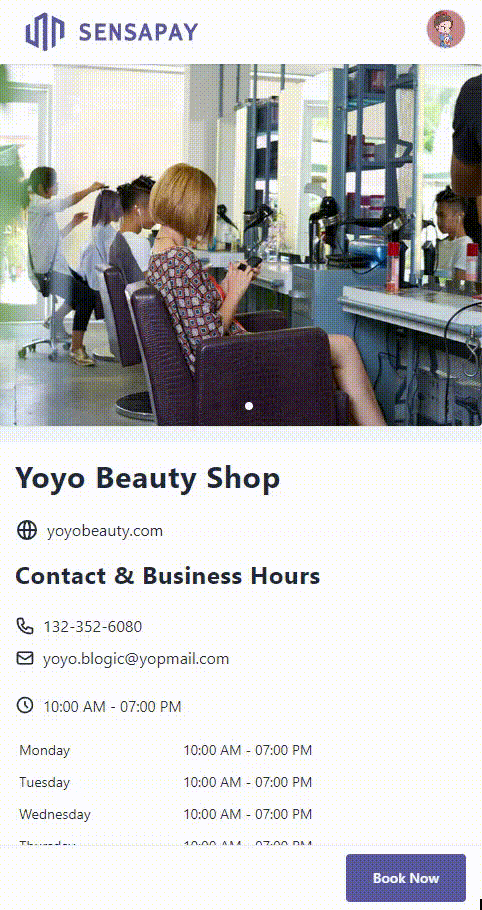
What clients see on Booking Page
Add staff and set up working hours
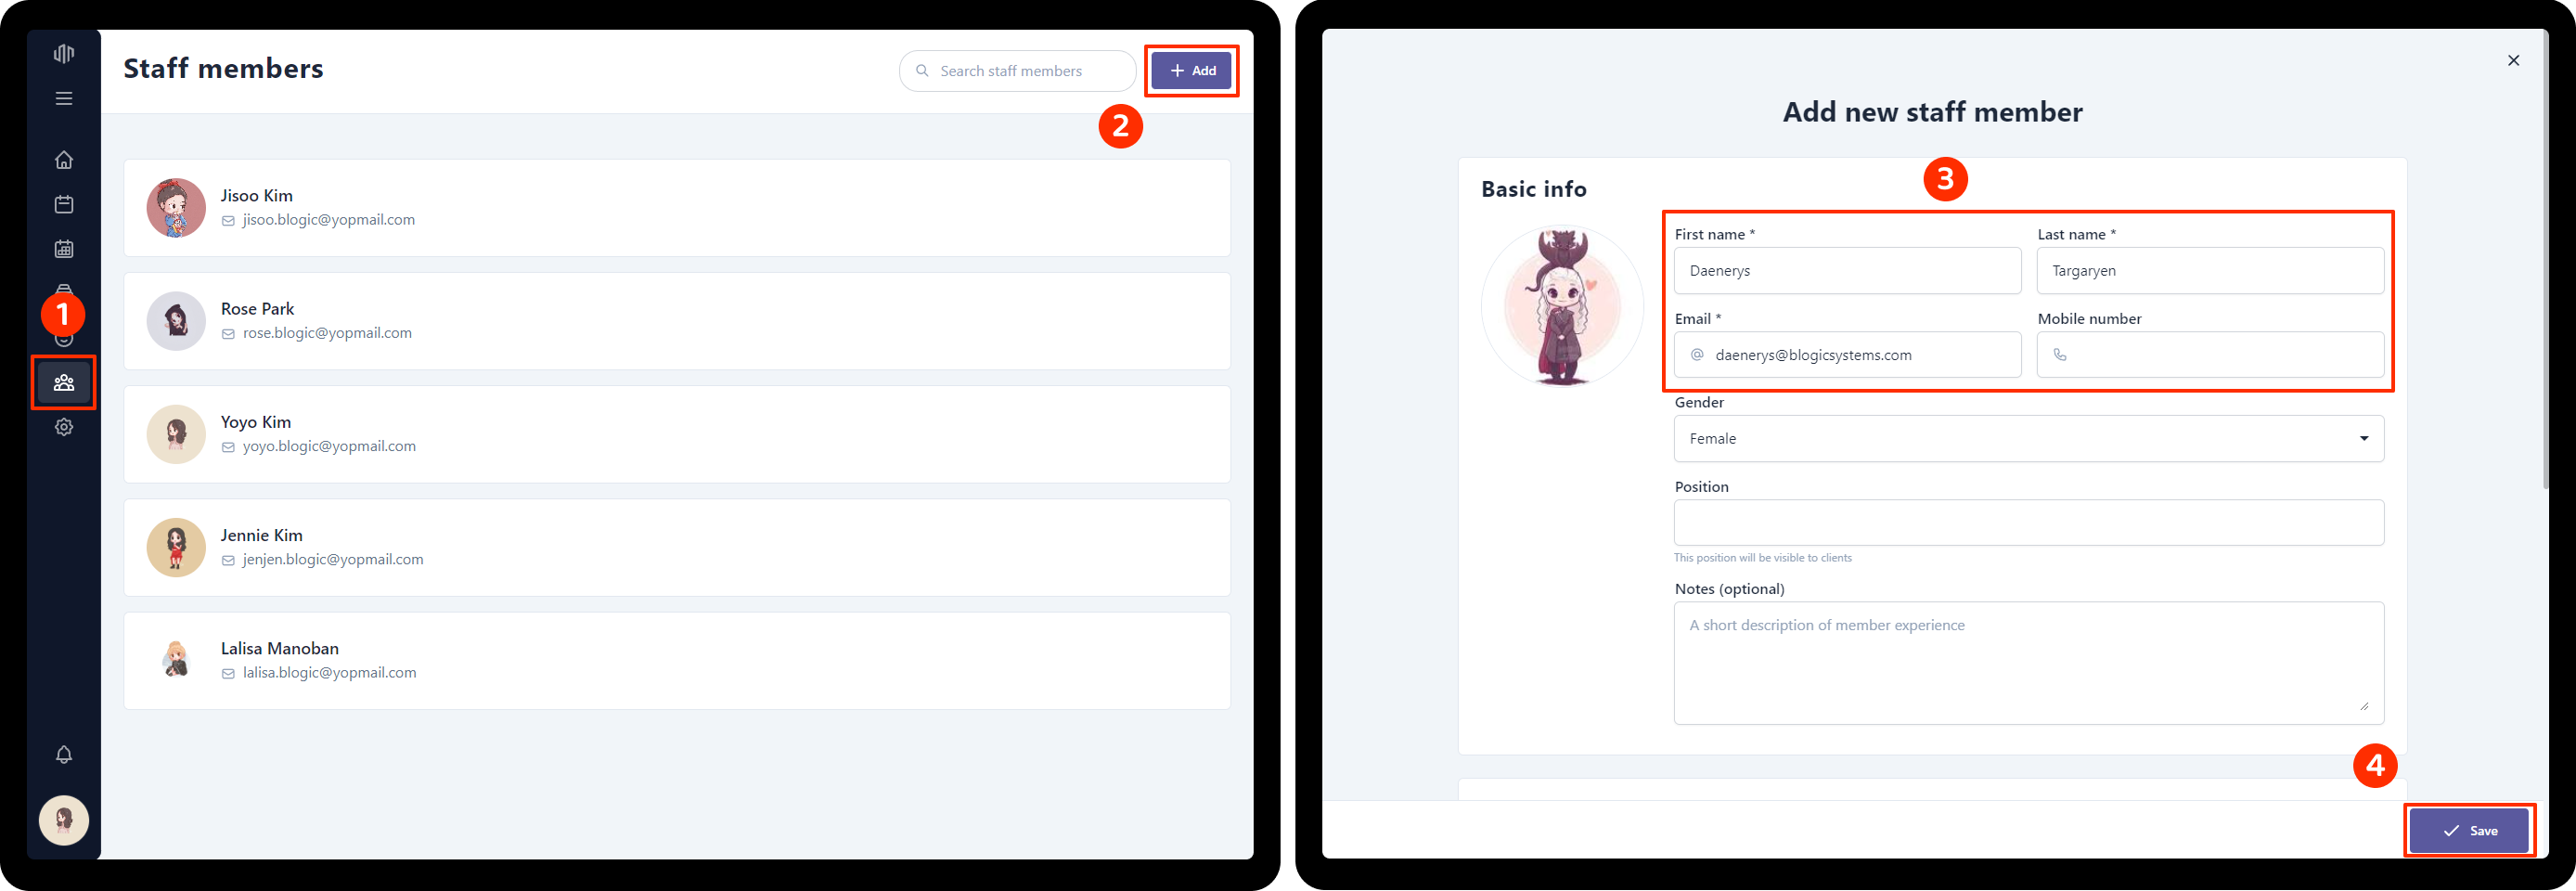
Add a new staff
To create an appointment, you’ll need to set up bookable staff members that can perform your services. You can invite team members to create and set up an account themselves via email or add their details manually.
To add a new staff:
- Go to Staff members on the side menu bar
- Click Add on the top-right corner
- Set Staff name, Email. Other fields is optional
- Click Save
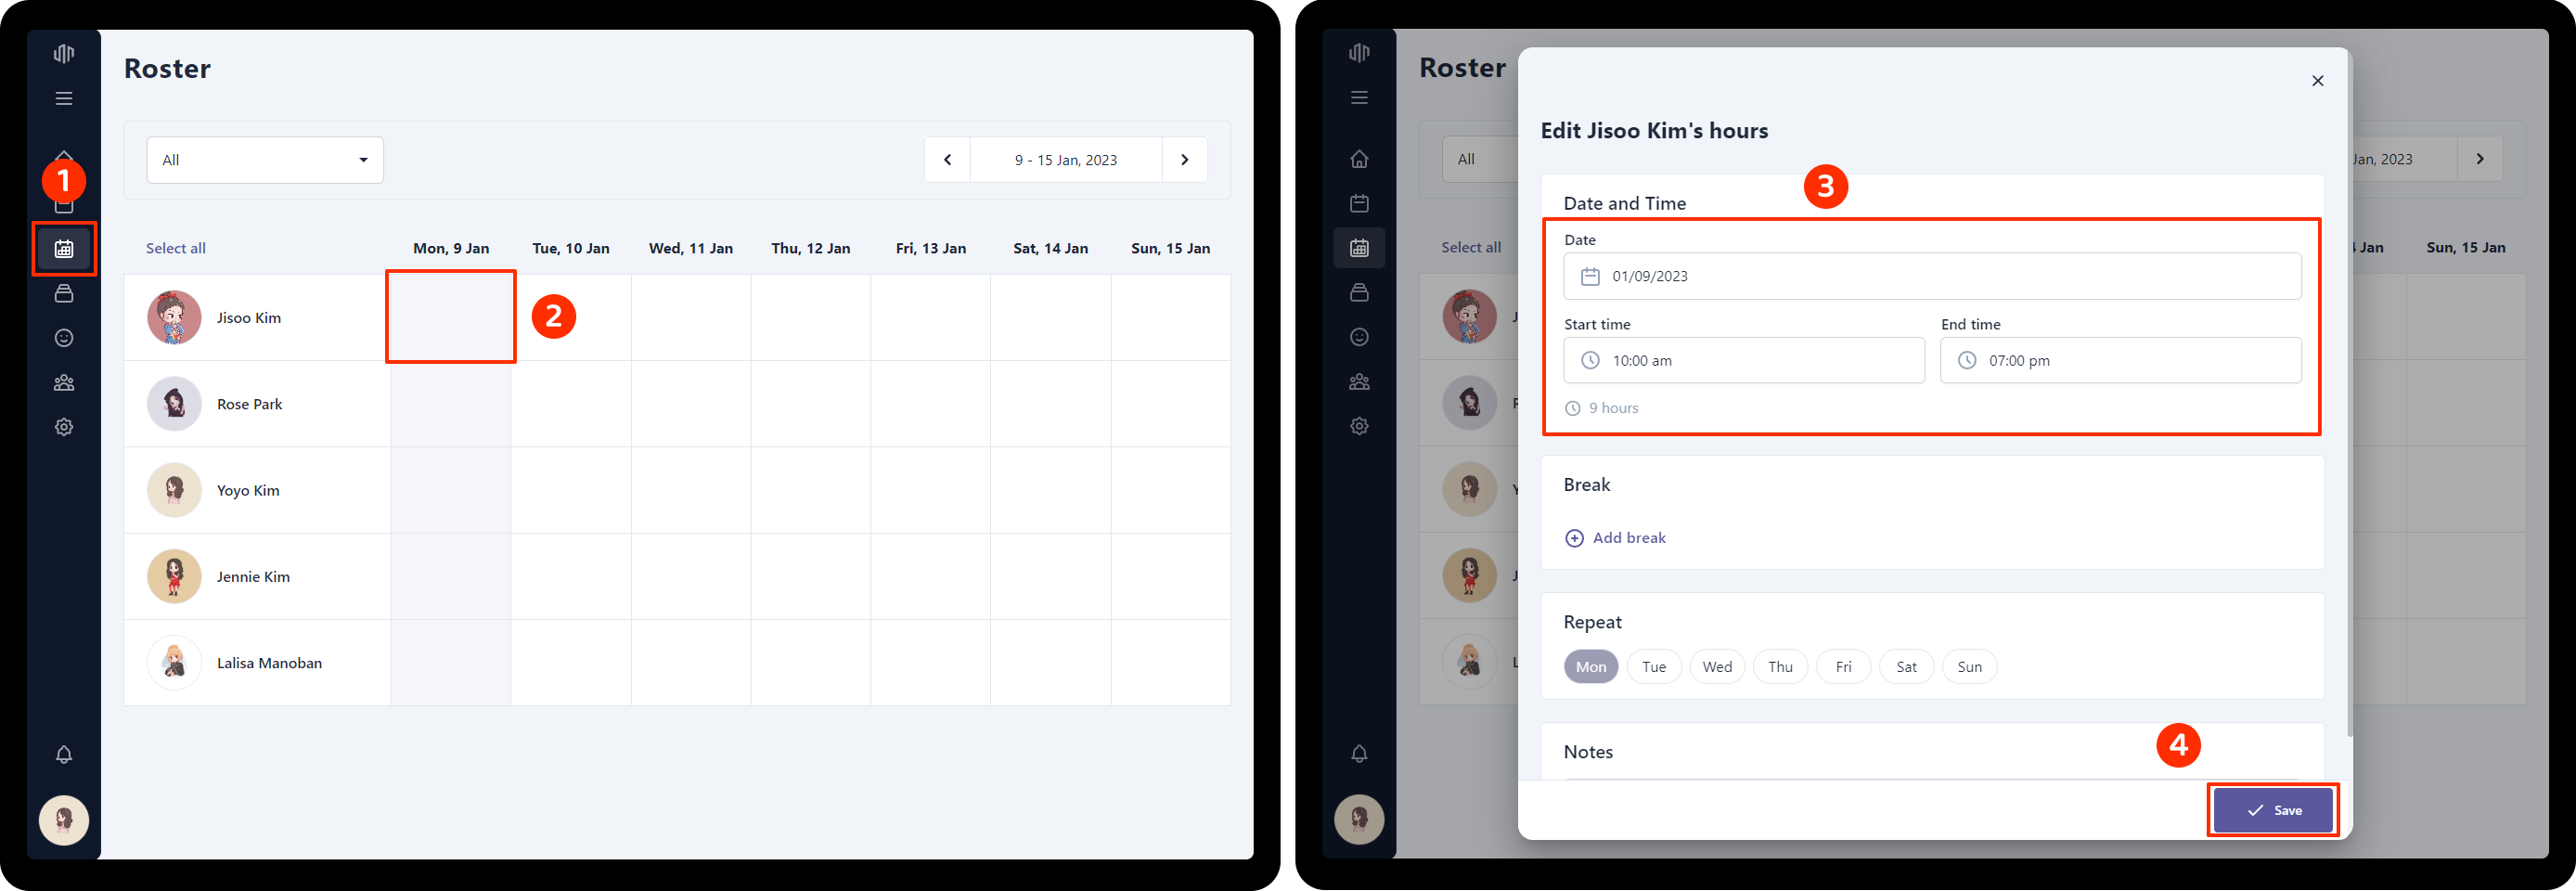
Set up staff available hours for online booking
This is what your clients will see in online booking. For example, even when staff is on duty on Monday, you can still close her Monday hours in online booking setting. So your clients will not see him/her upon booking.
To set working hours for staff members:
- Go to Roster on the side menu bar
- Under the calendar section, check on the days you want to enable online booking for your staff
- You can adjust available times and break times if necessary
- Click Save
Visit your page
Congratulations on your launch! 🎉🎉🎉
Now, your business is ready to run. You can visit your booking page or share the link to your clients.
- Go to Setup on the side menu bar
- Click Online booking section
- Click on the link in section Booking page to open your page in new tab
This is the page that your clients will see!